

How to Set up Your Live Chat – 5 Easy Steps For a Quick Start
“ Be up and running within minutes. ” When you first sign up for a new software, however, you might feel overwhelmed by all the choices and settings. So which steps does it take to simply get started with Userlike?
Live chat should be easy to use – for everyone. The way we built Userlike, you don’t need to be a tech person to add live chat to your support stack.
Here’s our expert guide on the very first steps for getting started with Userlike.
1
Integrate your Widget code
For your Chat Widget to be visible on your website, you’ll first need to implement your unique Javascript code into your site’s HTML:
- To find your code, go to in the Dashboard, select your Widget, then head to the Install tab.
- Copy your Widget’s code and paste it into your website’s source code, right before the closing body tag.
- Save your modifications and upload them to your web server.
- Congratulations, you’re done! :)
Check out our video below to see how this looks in action.
If you’re using a shop software like Magento, Google Tag Manager, or WordPress , the integration process works a bit differently but it’s just as simple. You’ll find detailed directions for each integration in our tutorials .
2
Customize your Widget
Now that the techy work is done, it’s time for some beauty tweaks. Your Widget is integrated on your site and your visitors can start reaching out to you. But you might feel that it doesn’t fit perfectly into your website just yet.
Tip: If you don’t want your visitors to see the Chat Widget until it looks and works exactly how you want it to, you can also do this step before you implement it on your website.
One of Userlike’s core features is the myriad options you have for adjusting your Chat Widget’s style and behavior, so it fits your needs right.
Wording
How do you want to approach your visitors? When you’re running a streetwear online shop , you probably want to address them differently than when you’re a financial institution . In general, the tone your company communicates with should also be reflected in your chat support.
That’s why you can fully adjust all visible texts for your Chat Widget. If you offer multilingual support , you can use our default Widget texts which are currently available in 25 languages.
In the Dashboard: Go to the Widget Editor , select your Widget, then head to the ‘Wording’ tab.
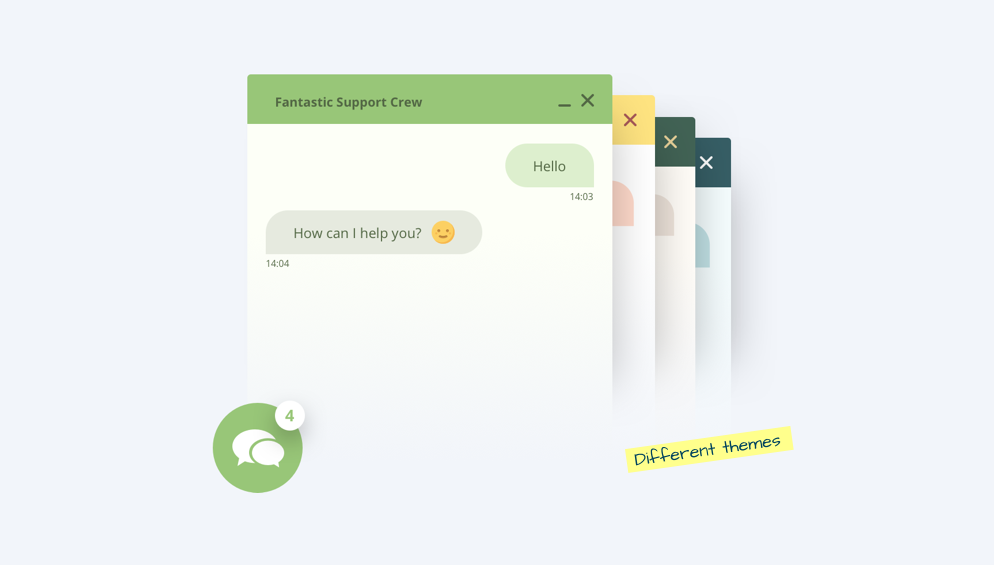
Design
You’ve spent time and money on building a website that looks great. And you’ll want your Chat Widget to fit in nicely while still popping enough for your visitors to notice. So, besides the text, you can also adjust your Widget’s design fully to your wishes.
Adjust the color of your Chat Widget, choose between different fonts, and set an Eyecatcher to draw more attention to your chat. Like with the wording, you can use your custom font and colors to make your Widget compliant to your Corporate Identity.
You can also adjust the position of your Widget, for example, when you have a badge on your website which you wouldn’t want to be hidden beneath the Widget. If possible, we recommend to put your Chat Widget in the right bottom corner as that’s where customers have come to expect live chat windows.
In the Dashboard: Go to the Widget Editor , select your Widget, then head to the ‘Appearance’ tab.
Behavior
You can choose from different types of chat modes according to how you want your chat to behave. For which you decide depends on the goals you’ve set for your service.
If you want to actively encourage your visitors to start a chat, the proactive mode would be the best choice. The Widget will then pop up after a set timeout, for example, after the visitor has been on your site for 30 seconds. Or say, you need specific customer information before a chat, e.g. their account number or email address, you could select registration mode.
Looking for better customer relationships?
Test Userlike for free and chat with your customers on your website, Facebook Messenger, and Telegram.
Read moreYou can also decide what should happen with the chat outside of your service hours, for example, display an offline form or hide the chat.
In the Dashboard: Go to the Widget Editor , select your Widget, head to the ‘Chat’ tab and select ‘Behavior' from the dropdown menu.
We know that data privacy is a crucial topic for most businesses these days. Userlike offers a variety of functions that allow you to adhere to the GDPR. Setting up a GDPR-compliant Widget is a breeze. Check out our privacy features in this post .
3
Add your teammates
Now on to the human part of the equation – your Operators! If you’re offering chat support in a team, you want to add everyone to Userlike before you start chatting.
When you set up your profile, we recommend using your real name and picture. That gives a more personal touch to the conversation and takes away the uncertainty many people have of whether they’re talking to a chatbot or human in the chat.
But you can also set an Alias and choose one of our stock photos, should you prefer to stay anonymous.
Chat slots – how many chats you can have at the same time – can make or break your live chat experience. While it’s possible to have up to 10 chat slots, we recommend starting out with 3. Otherwise you might feel like you’re drowning in the number of simultaneous chats and you probably also won’t be able to serve all customers in a timely manner.
To save you from this stress, put a cap on your chat slots. Depending on your product knowledge and how comfortable you feel with the chat, you can always adjust them later on.
In the Dashboard: Head to your profile in the upper right corner, select the Chat Panel tab and set the amount of chat slots you want to have.
Organize your team in functional Operator groups, for example by departments or languages. That way, you leave the choice of who your visitors want to talk to to them. So they’ll get directly to the right contact person when they reach out to you in the chat.
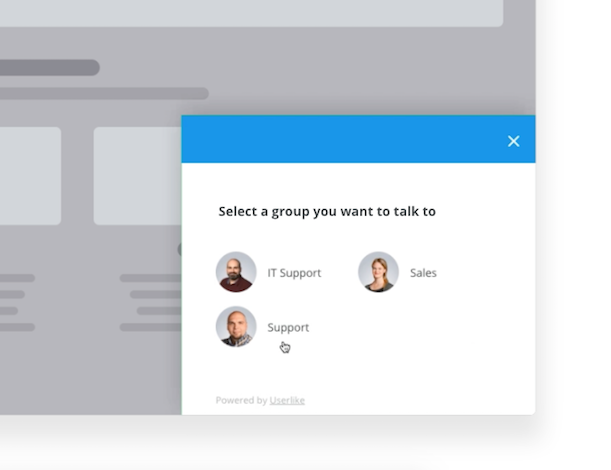
You can also assign different roles to your Operators, such as Agent or Manager. That allows you to restrict access to certain parts of the Dashboard, for example, your Analytics.
In the Dashboard: Go to Config > Operators and add your Operators.
4
Integrate your business tools
At Userlike, we focus on building the best live chat experience for you. But to use the full potential live chat offers, using add-ons is helpful to connect Userlike with your favorite business tools.
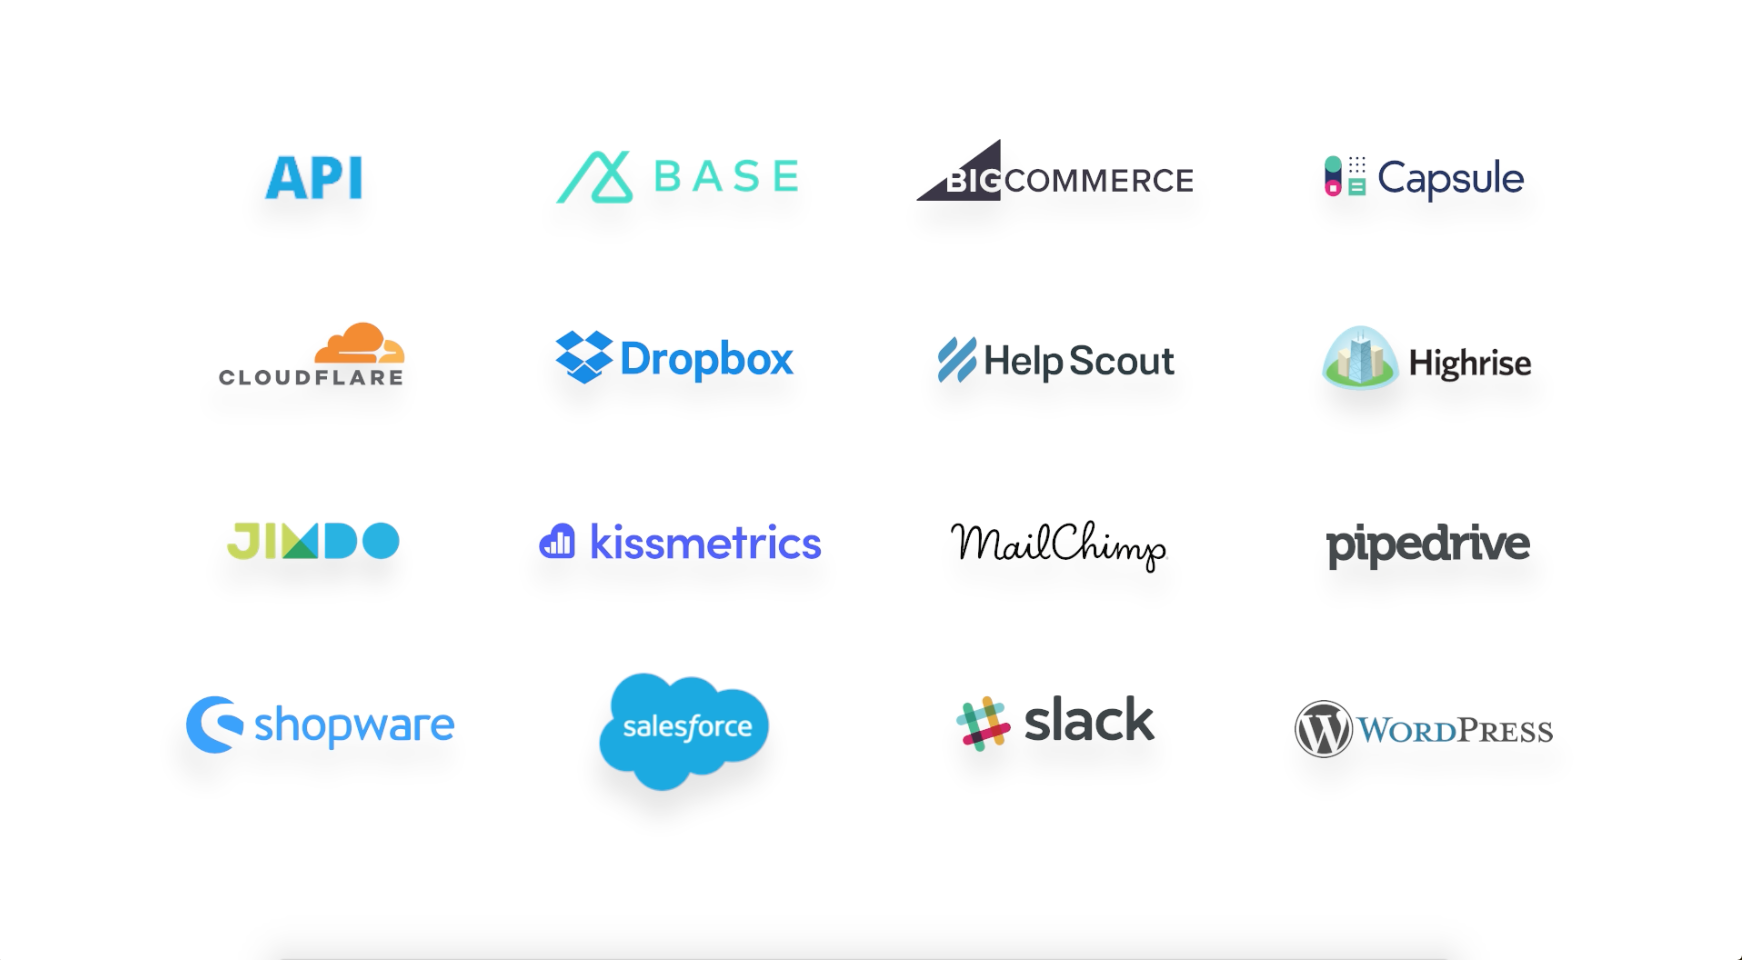
As an additional channel, live chat should seamlessly fit into your existing workflow. That’s why we offer a wide range of CRM and ticket integrations , such as Salesforce, Pipedrive, Help Scout, and more. These allow you, for example, to push your user information to Userlike and pull chat transcripts and offline messages to your CRM.
Check out how to do that in our add-ons tutorials .
5
Have fun chatting!
Now that you’ve implemented your Widget on your website and made all relevant configurations, you’re good to go and start chatting!
The Chat Panel is your support cockpit. It’s browser-based, so you don’t need to download anything. You just access it from inside the Dashboard.
Once you’re in the Chat Panel, change your status to online to be able to get your first chat. If you want to take a watercooler break and not get any new chats, you can simply set yourself to away . That’s our pause mode which will prevent you from getting any new chats while you can still finish the ones you have.
Chat is a fun, direct channel to connect with your visitors. For some chatting best practices, download our guide on professional communication in support.

Free Guide to Professional Communication in Customer Support
Download our free guide and master professional customer communication across channels.
Get your guideWant to learn more about Userlike?
These are just the basic, most important steps to get you started. Of course, there’s much more advanced things to configure, such as:
Or take a look at our webinars to get a detailed product tour plus hands-on tips from our Customer Success team.
And should you have any questions, feel free to reach out to us via the chat on our website or Messenger . We’re happy to help :)
Don’t have a Userlike account yet? Sign up for free here .
