
This tutorial explains how to set up the team that will be working with your Userlike account. This configuration allows you to control your organizational structure, and it plays a large role in your customer experience.
These are your team’s main building blocks:
- Operators: This is the term for the users in your Userlike account (you and your colleagues), regardless of their role.
- Roles: You can assign different roles to your operators, giving them different levels of access permissions.
- Groups: Every operator belongs to an operator group. These groups are where your Widgets route incoming conversations to.
- Skills: You can define skills and assign them to operators, it’s an advanced way to match customer questions with operator knowledge.
Operator overview
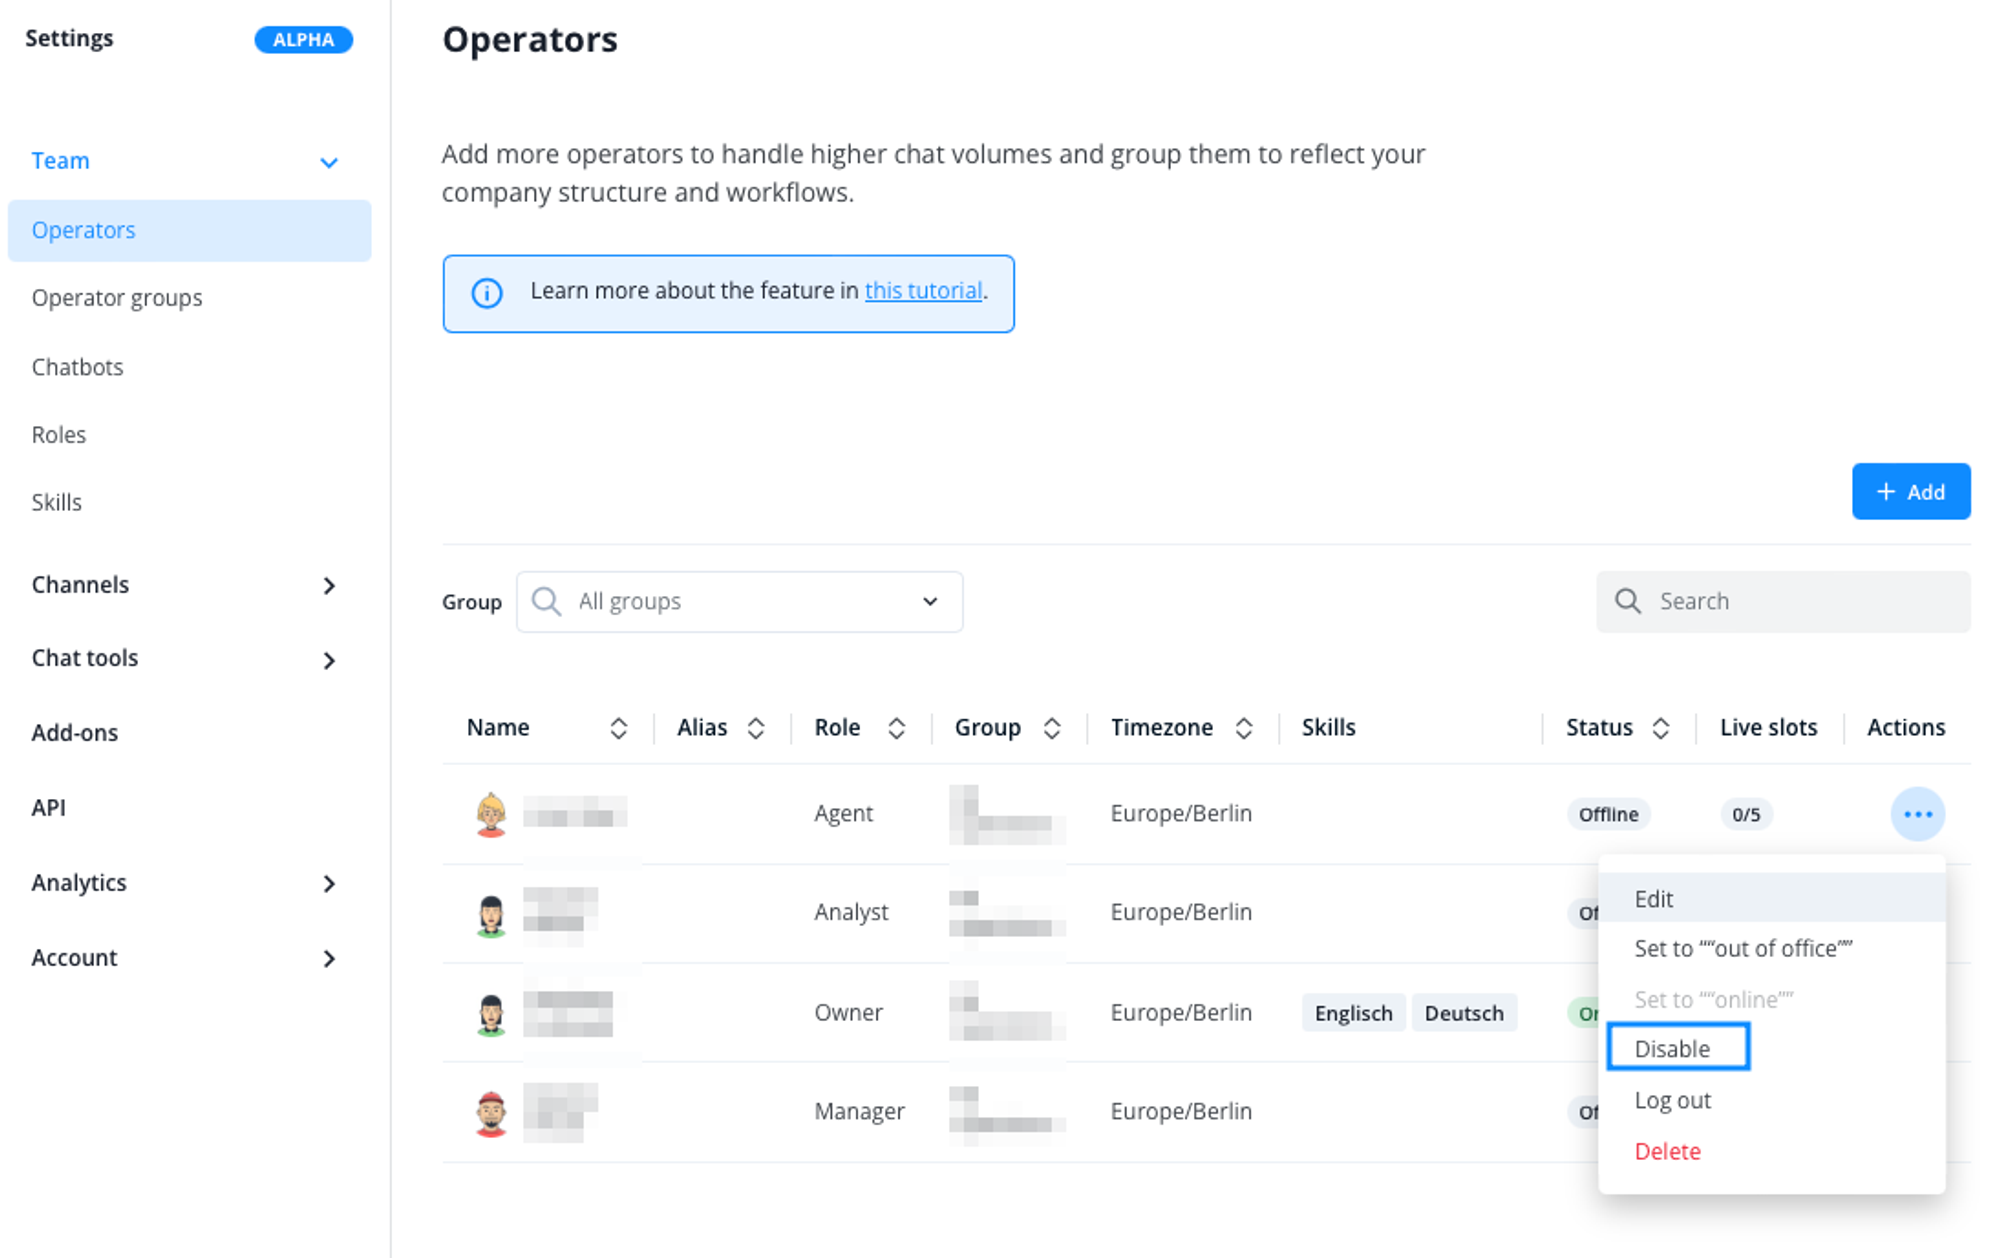
To get an overview of your operators, open the Team > Operators section. You can identify the name, alias, role, and group of the operators in the list. Depending on the screen resolution, you can also see the timezone and skills of the operator at a glance.
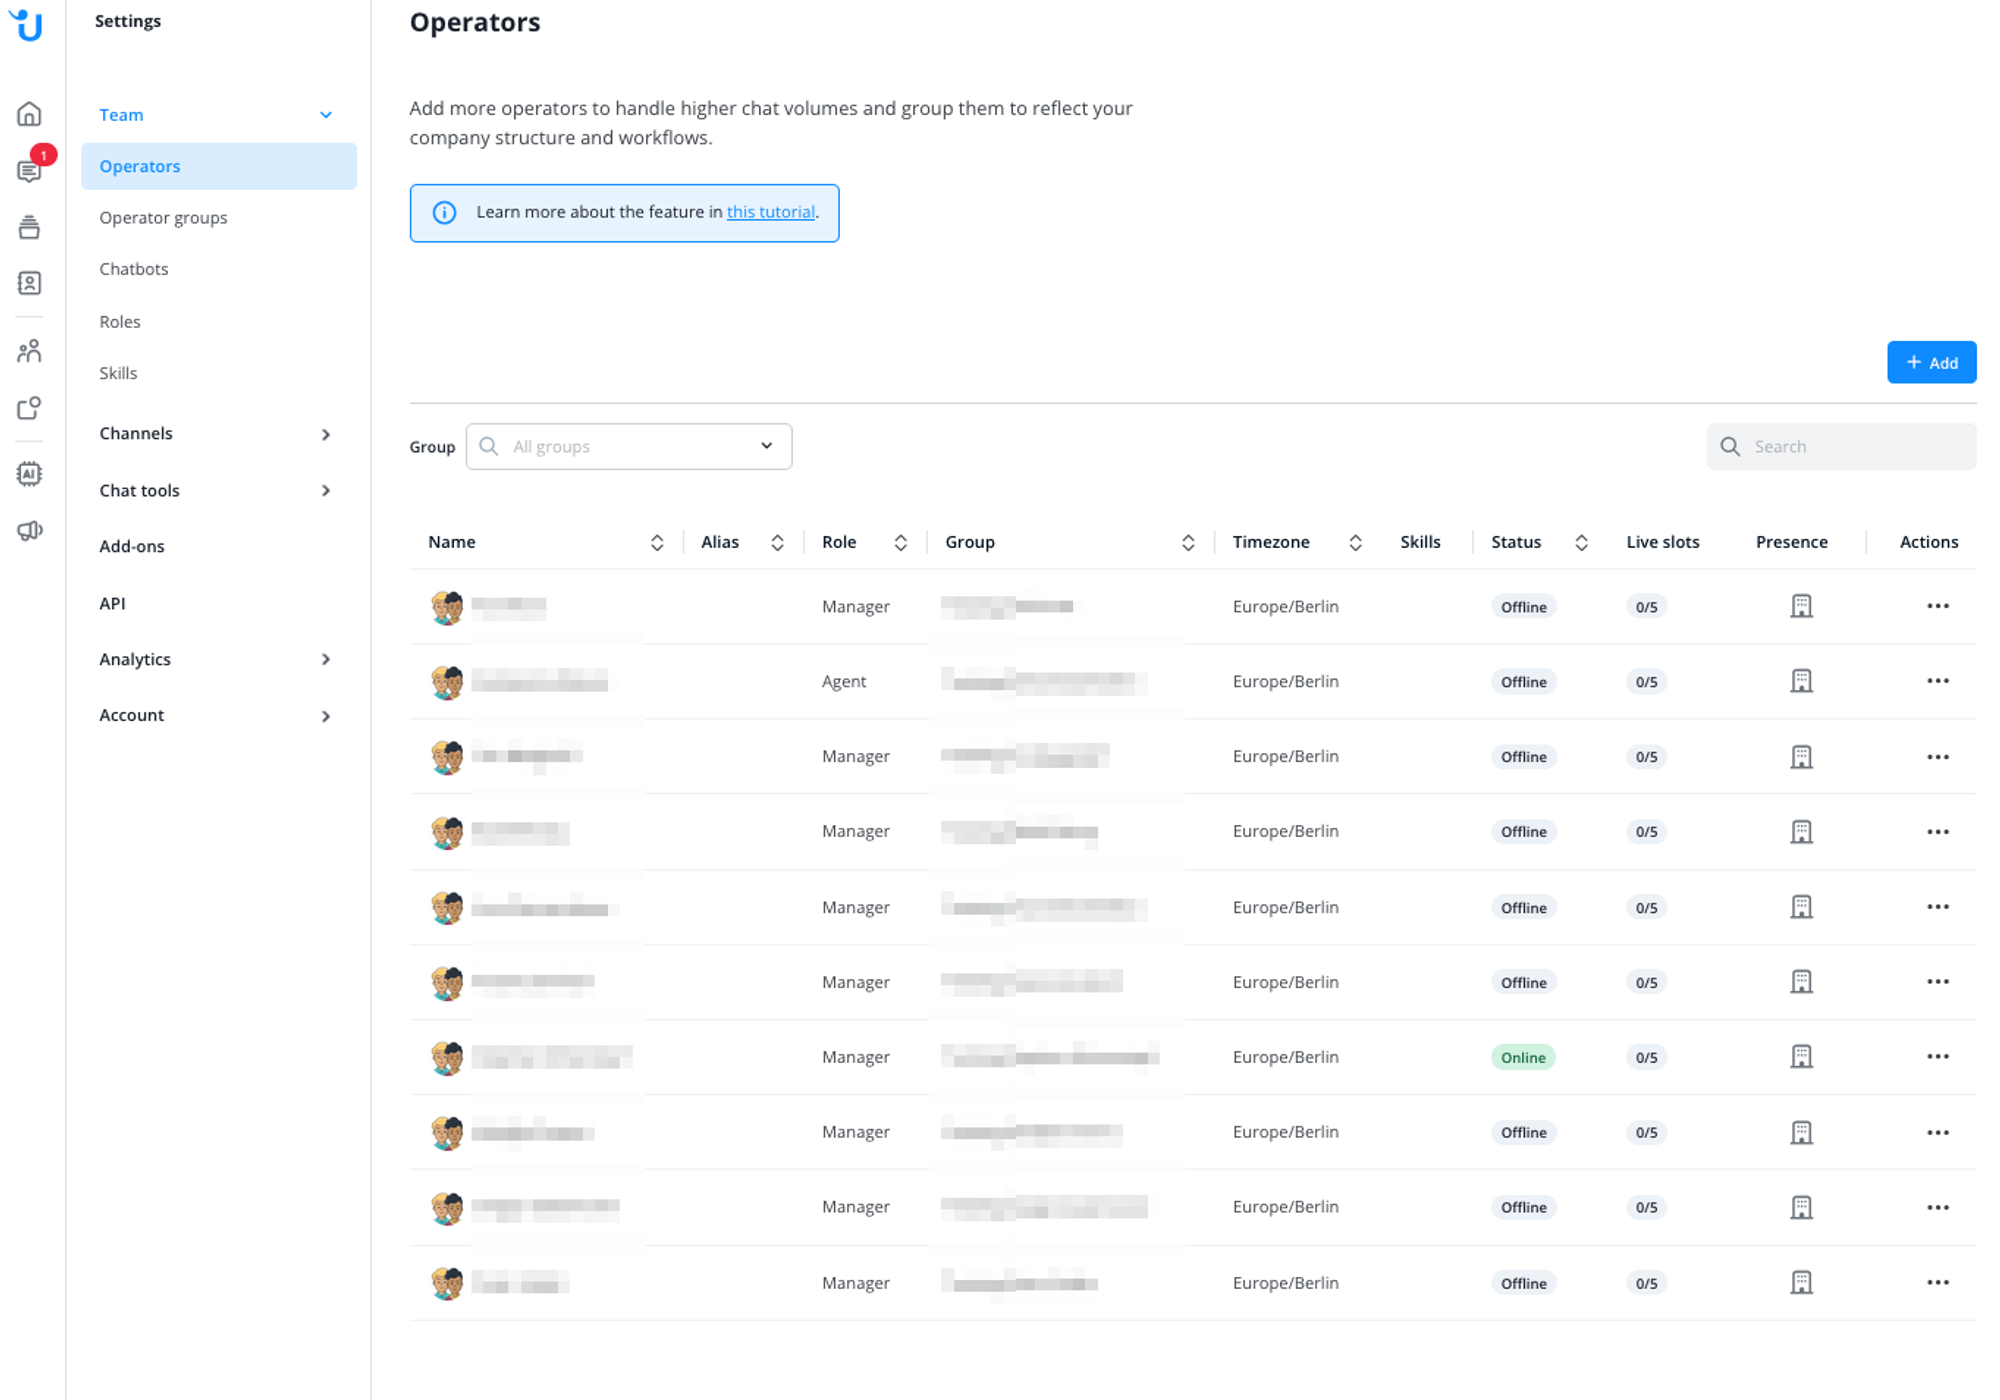
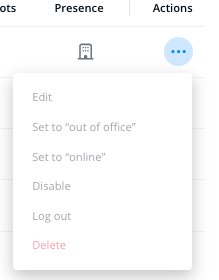
In this view, you can make the following settings for each operator:
- Open the operator settings in detail.
- Set the operator to "Out of Office" status.
- Change the operator status (online/offline).
- Activate or deactivate the operator.
- Log out the operator from the system.
- Delete the operator.
Adding operators
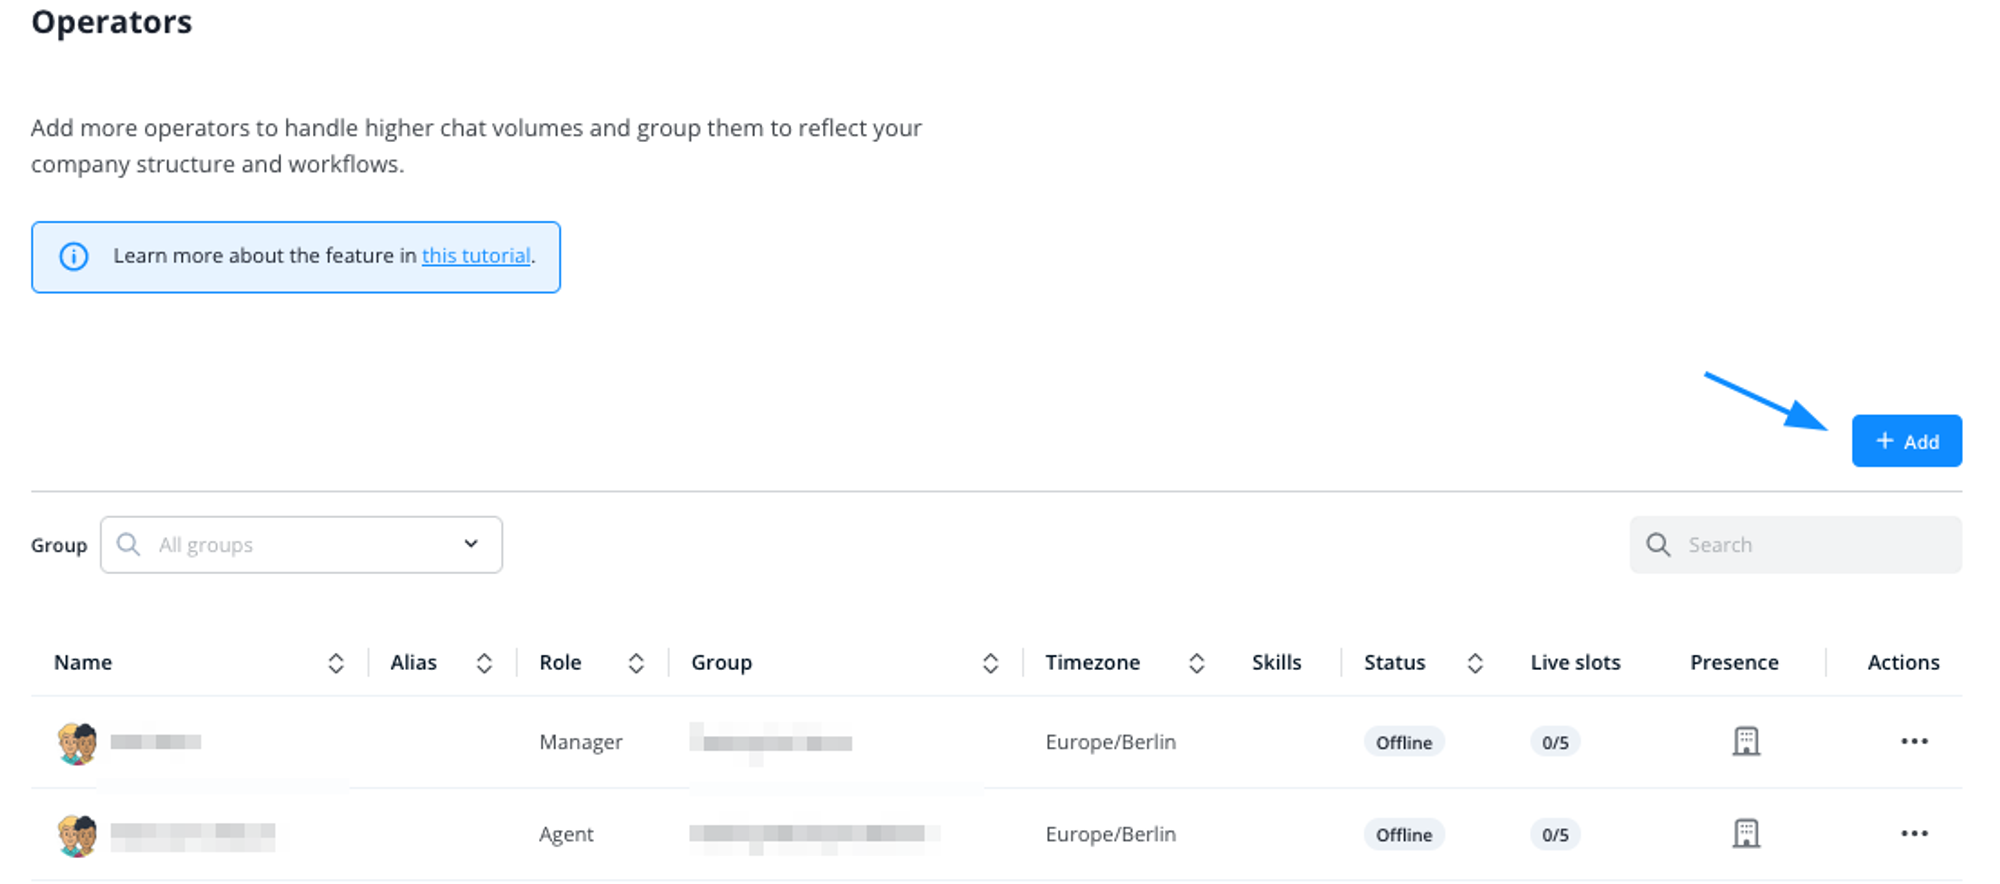
You set up your operator team in your Dashboard under Team Operators Here you get an overview of all your operators. To add a new one, click Add operator.
- First name: The first name visible to your contacts and colleagues.
- Last name: The last name visible to your contacts and colleagues (optional).
- Username: operators use this name for logging in, it needs to be unique and cannot be changed later on. Alternatively, the operator can also use their email address to log in.
- Email address: This is the operator’s correspondence address for everything Userlike-related. It can also be used for login.
- Notification settings: Decide for which events the operator receives emails from Userlike. System messages are crucial, so we definitely recommend selecting those. Chat stats offer a quick daily performance update. In the newsletter our founders share insights about Userlike developments.
- Role: Here you set the level of access permission, which decides what the operator can or cannot see and do in your account. Read more in the dedicated section on roles below.
- Language: The language of the operator’s account and automatic emails.
- Time zone: This setting impacts the display of time-based information in your Dashboard, e.g. message timestamps in conversations.
- Operator group: Every operator belongs to an operator group. You can start by adding all operators to the default group and easily change this later if you choose to set up multiple groups.
- Messaging notifications: This determines the email notifications for customer activity that the operator receives when using our product.
After clicking Create operator, your invited team member receives an email with their login details. They also appear on the screen of the one who created the operator.
You can also add chatbots to your team. It’s a bit more complex, so we recommend you follow this tutorial.
Operator profiles
Operator profiles can be edited by operators themselves via My Profile in the top right corner of their Dashboard. Edit the profiles of other operators under Team Operators
In the personal settings you find seven tabs.
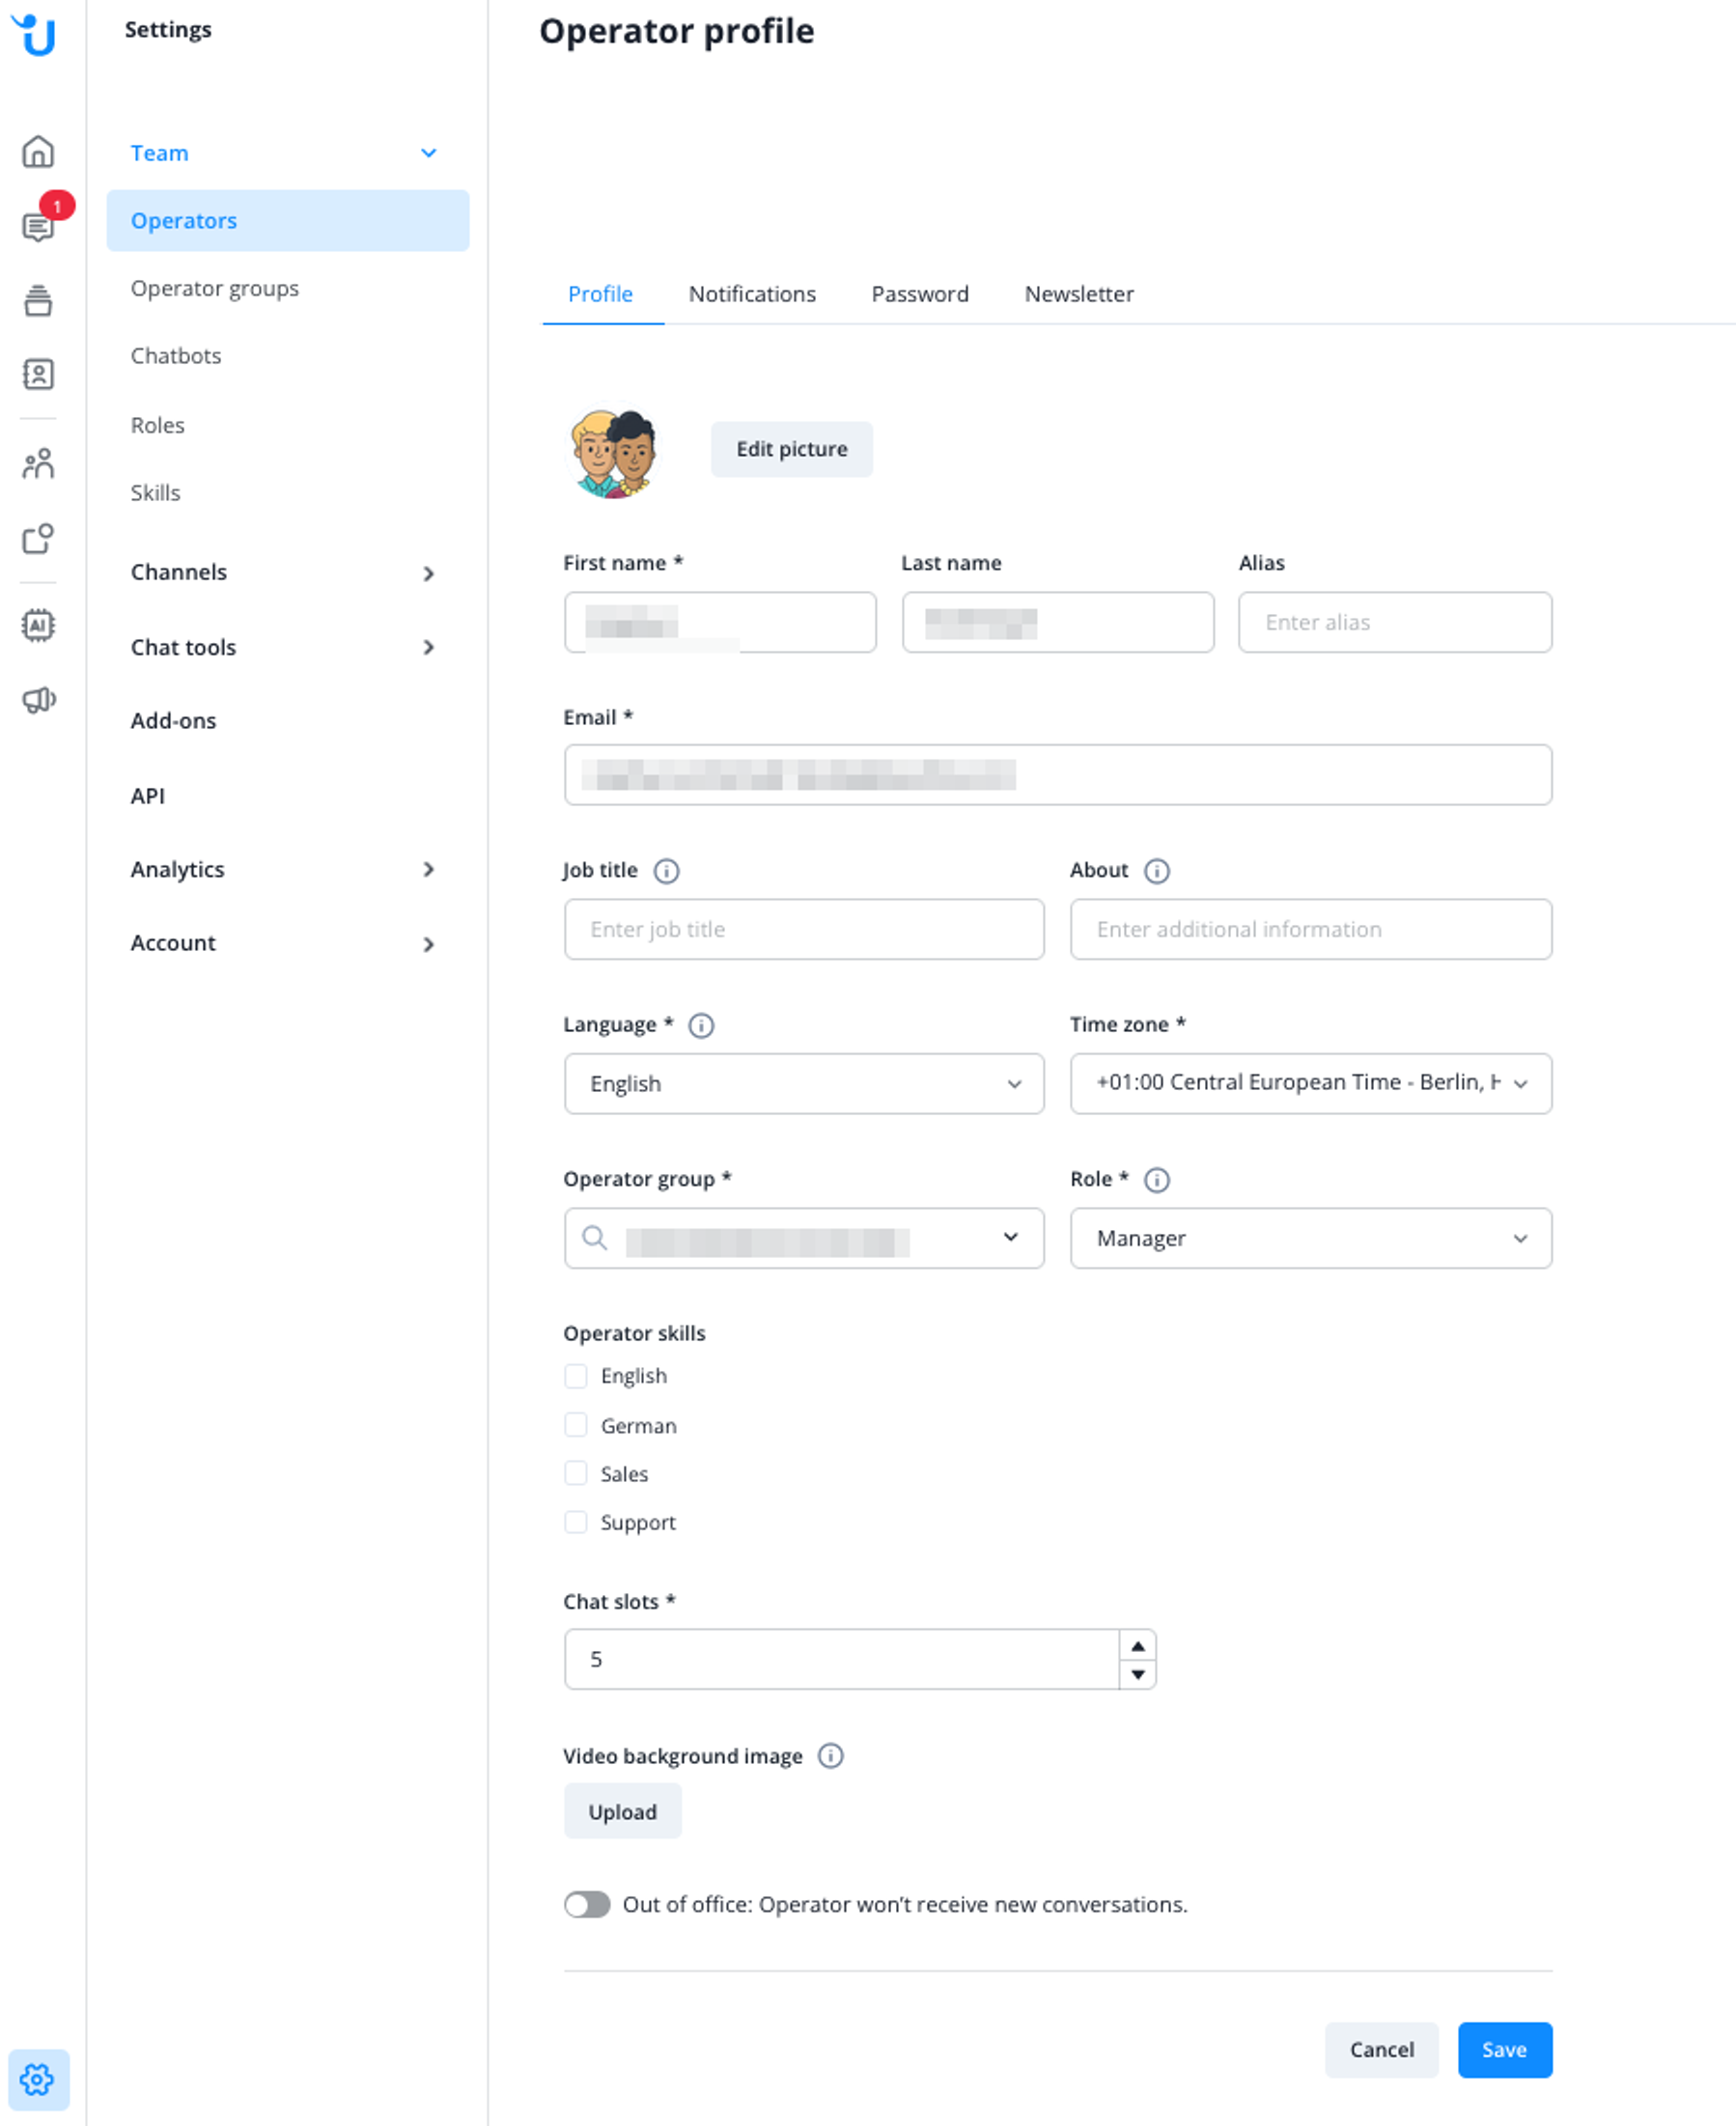
Profile
- Profile picture: This is the image visible to your contacts when you’re offering messaging support. A real profile picture adds a more personal feel to the customer experience, which is why we always recommend uploading your own. You can, however, also choose a generic image from our library. Together with the Alias feature (read below), this allows you to hide your operator’s identity from contacts.
- Username: Used to log in and cannot be changed once set. You can also enter your email address at login.
- First and last name: Visible to your contacts when you’re offering messaging support, unless you use an alias (read below). First name is required; last name is optional. Common reasons for limiting to first name are to create a more informal experience, or to prevent people from using the full name to look up the online presence of operators.
- Alias: Enter a name here and it will appear for your contacts instead of your real name. This hides your real identity from contacts, while it remains visible to the members of your Userlike account.
- Email: The email address that you can use for logging in and on which you receive Userlike emails.
- Language: This sets the language of your Dashboard and Userlike emails. You can adjust the language of your website Widget, which your contacts see, to almost any language in the Widget Editor.
- Time zone: Sets the time zone of your Dashboard. It affects the display of date information within the Dashboard, for example the dates attached to conversation transcripts and messages.
- Group: Select a group the operator should belong to. Operator groups are connected to one or multiple Widgets. When conversations come in, these Widgets then route them to their connected groups and the associated operators.
- Out of office status: When the operator is not available for a longer time, you can enable this setting to prevent them fom receiving receiving new conversations. Instead, these conversations will automatically be routed to another, available operator, ensuring your contacts don’t have to wait for an answer or start a new conversation.
Organizations (only visible to Owners of Flex accounts)
In this tab the Owner of your account can control an operators’ access to your organizations. This is handy if you have multiple organizations and want to divide your staff into independently operating teams. Operators who have access to an organization can view and configure its Dashboard based on their role’s permissions.
You can either give operators permission to access all of your organizations, or choose a subset of organizations if you have more than one.
You can find more Information in our dedicated tutorial here:
 Organization Settings and Switching
Skills
Select from a list of pre-configured skills, which of them the operator possesses. Read more on operator skills further down.
Notifications
Configure for what messaging and account events you receive browser or email notifications when logged in to Userlike. This keeps you informed about communication events, even if you’re not actively offering support yourself. Note that browser notifications don’t work on all browsers, especially not on older versions.
Audio
Configure for what messaging events to receive sound notifications when in the Message Center.
Message Center
Tailor the Message Center to your personal preferences. Activate keyboard shortcuts, set your maximum capacity of simultaneous chats (slots), and whether to be notified about navigation (contact changing URLs) and system events (contact closing the chat, reloading page, etc.) with messages in your chat flow.
Presence
You can reset an operator’s online presence operator if they appear online although they’re not connected. This might occur when you use an IM client that doesn’t disconnect properly.
Password
Here you can request a password change done by the operator. The next time the operator is trying to login they are asked to change their password. The operator can also manually change the password in their My Profile menu.
Please refer to Userlike’s password rules.
Operator roles
Operator roles determine the level of access permission of your operators. You can assign them when creating operators or editing their profiles.
Userlike offers a standard set of roles with set access permissions:
- Owner: The Owner is the mightiest of roles: it is created when you first register your Userlike account. It cannot be deleted and by default has all capabilities enabled. The owner role is able to transfer the rights to another, existing operator.
- Manager: After the Owner, the Manager is by default the most powerful role. It can, however, be completely customized to your needs.
- Admin: The Admin role by default is still powerful enough to manage different operators or Widget settings and make changes to Analytics.
- Staff: The Staff role can chat with contacts, edit conversations and view several settings sections.
- Analyst: The Analyst role is very similar to the Staff role. Conversely to the Staff role, though, the Analyst can access Analytics data and view conversations but not chat with contacts.
- Agent: Next to the Owner, the Agent is the other special role we offer: agents only have access to the Message Center where they can answer and edit conversations of their own group and to the contact overview. Use this role for operators that only chat with contacts and don’t browse the Dashboard.
You can get pretty advanced by adjusting the exact permissions belonging to the above roles in Userlike’s higher-end plans. For such a setup, check out the dedicated Roles Tutorial.
Operator groups
Every operator belongs to a group. When setting up your Widgets, you define to which group their conversations should be routed. You could use one default group for all your Widgets, but you could also split up your team in multiple groups. This allows you to group areas of expertise (e.g. by language) and match them to your customer questions.
Add a group
Set up your operator groups in your Dashboard under Team Operator groups Here you see all your operator groups. To add a new group, click Add group, then enter a name and description.

Group select
When you edit a group, you can also add a group picture. When you enable the routing mode of Group Select in the Widget Editor, your contacts can choose before the start of a conversation with which group they would like to speak. The Group Select menu then shows the contact the names and images of the available groups.
Disabling operators
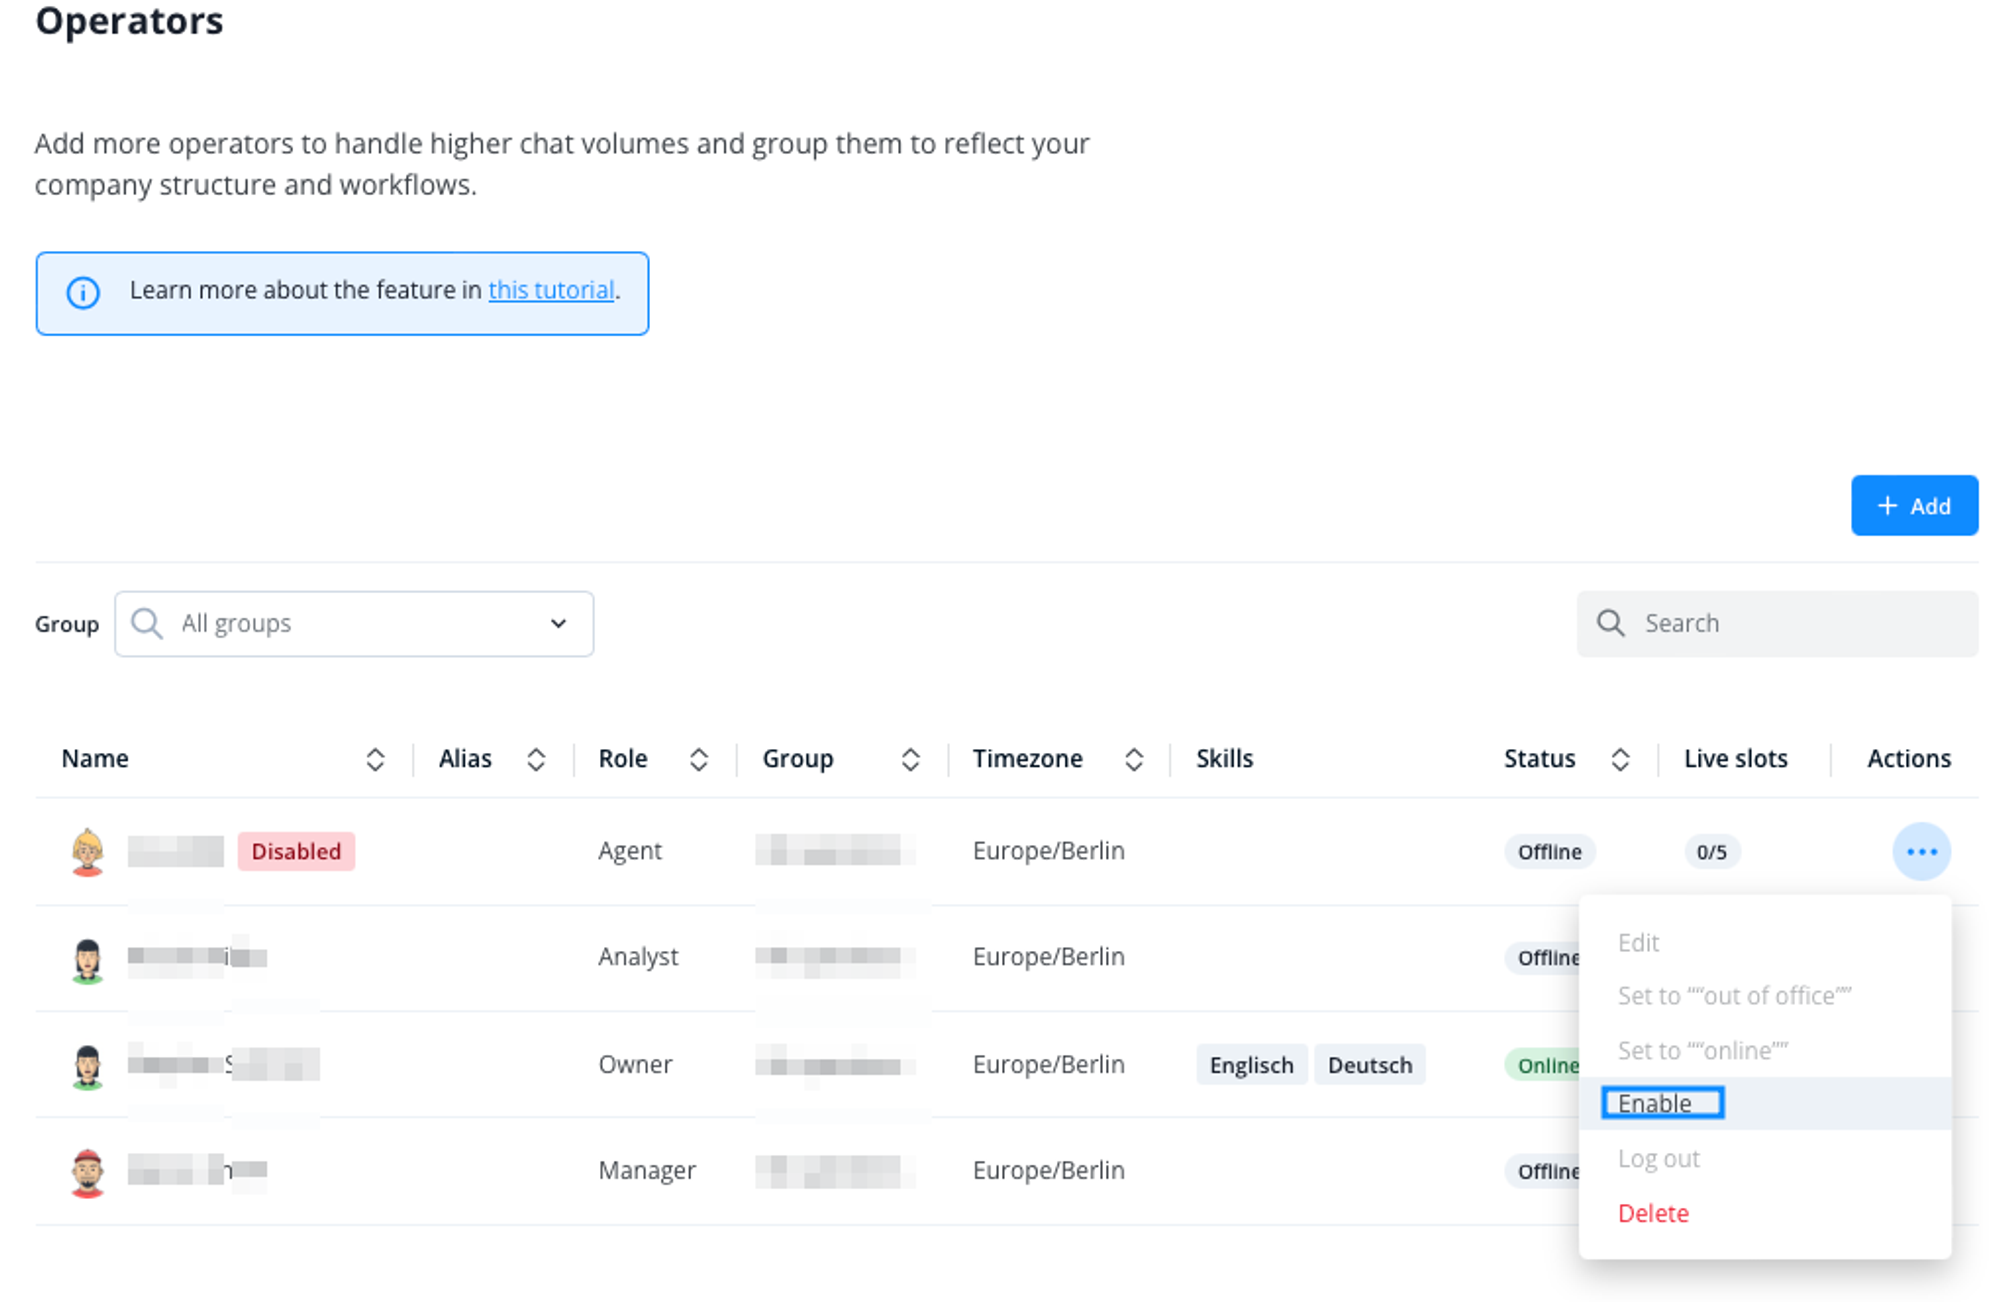
Operators can be disabled to prevent them from logging in or using the software. However, this operator still counts to your total number of operators you can use with your plan.
So disabling operators should only be done for the short term needs. If you do not need an operator's profile any more, it should be deleted.
To activate the operator again, click on Enable in the 3-dot-menu
Skills
Customer support is largely about matching employee knowledge with customer questions. With Userlike, you can go beyond group-based routing and Group Select, to match requests with specific skills and expertise.
With operator skills, you can define which skills are required for a conversation coming in through a certain Widget. Every available operator that possesses this set of skills is then eligible to receive the conversation, no matter their group affiliation.
Learn how to set this up in the Chat Routing Tutorial.
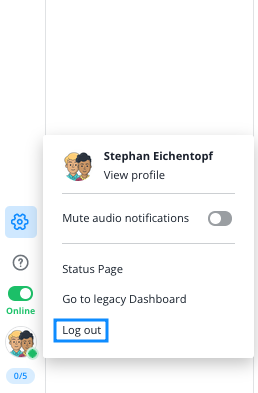
Logging out
Operators can log out of their accounts by clicking on their profile picture on the lower left and click on on “Log out”
Password rules
Userlike’s guidelines regarding password security are:
Password must have at least
- 14 characters, including
- at least 2 capital letters
- at least 2 non-letters